In these 5 steps we will help you to learn how to record and play in real-time your instrument with our plugins.
Do you want to record a guitar track and hear the amp simulation while you are playing?
Follow the steps to learn how to do that.
1. Connect the instrument
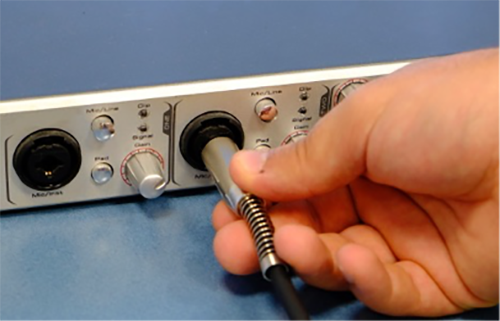
First, you need to connect the instrument, ex. Guitar, to your audio interface.
As you can see in the example below.
2. Create an audio track
The next step is to create an audio track on the DAW you choose to use. How to do that is different for each DAW. However, in most cases you just simply right click on the track DAW interface and choose “add new track”.
3. Load a Plugin
To complete the preliminary preparations load a plugin on the new track you have created.
As in the previous step, the process to load a plugin is different for each DAW. If you are unable to load the plugin consult the DAW manual.
4. Disable the direct monitoring
The next step is to disable direct monitoring: direct monitoring is an audio interface features which allows the user to hear the input signal of the audio interface with no delay. It takes the input signal from the audio interface and sends it directly to the output of the audio interface and so it is unprocessed.
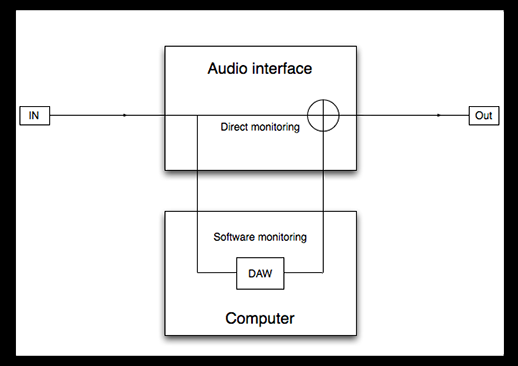
Each audio interface has a different way of disabling direct monitoring. In some cases there are physical knob on the interface front panel, in other cases you will have to disable the direct monitoring using the interface software application.
If you are unable to find the command to disable the direct monitor, look for instructions in the audio interface manual.
At this stage, you only need to activate the software monitoring (the name may vary depending on the DAW used).
5. Activate the software monitoring
The software monitoring, unlike direct monitoring, passes the audio signal through the DAW so that it can be processed using the plugin loaded on the track, before sending it to the output of the audio interface.
The process to activate the software monitoring will be different for each DAW.
Reaper
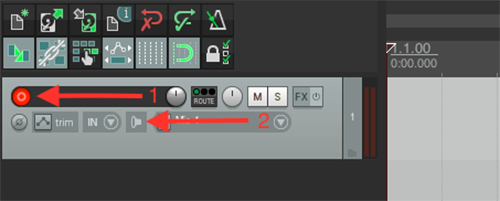
On Reaper for activate the software monitoring first you need to right click on the button pointed by the arrow n.1 called Record Arm, then click on the button pointed by the arrow n.2 called Record Monitoring.
Studio One 3

On Studio One 3, the software monitoring is called Monitor. To activate it click on the button indicated by the red arrow.
Logic Pro X

On Logic Pro X, you can find the software monitoring with the name of input monitoring.
Pro Tools 12
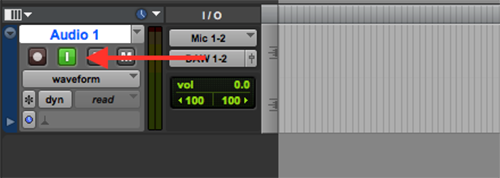
On Pro Tools it is called TrackInput monitor.
Cubase 9

As in Studio One 3, the software monitoring in Cubase 9 is called Monitor.
Ableton Live 9
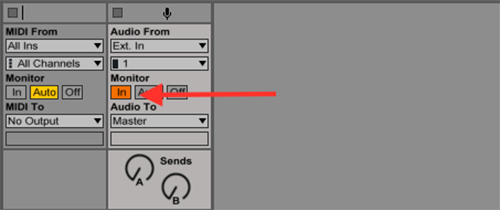
Finally, on Ableton Live 9 the software monitoring is called monitoring.
Garageband
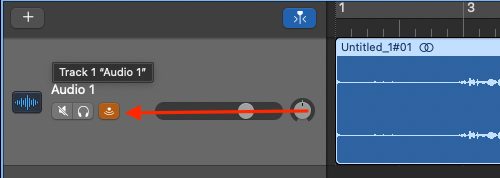
On Garageband you can find the software monitoring with the name of input monitoring.
Once the software monitoring is activated you should only hear the sound effect without the base sound background.
